Tuesday, April 13, 2010

Puppet Theater


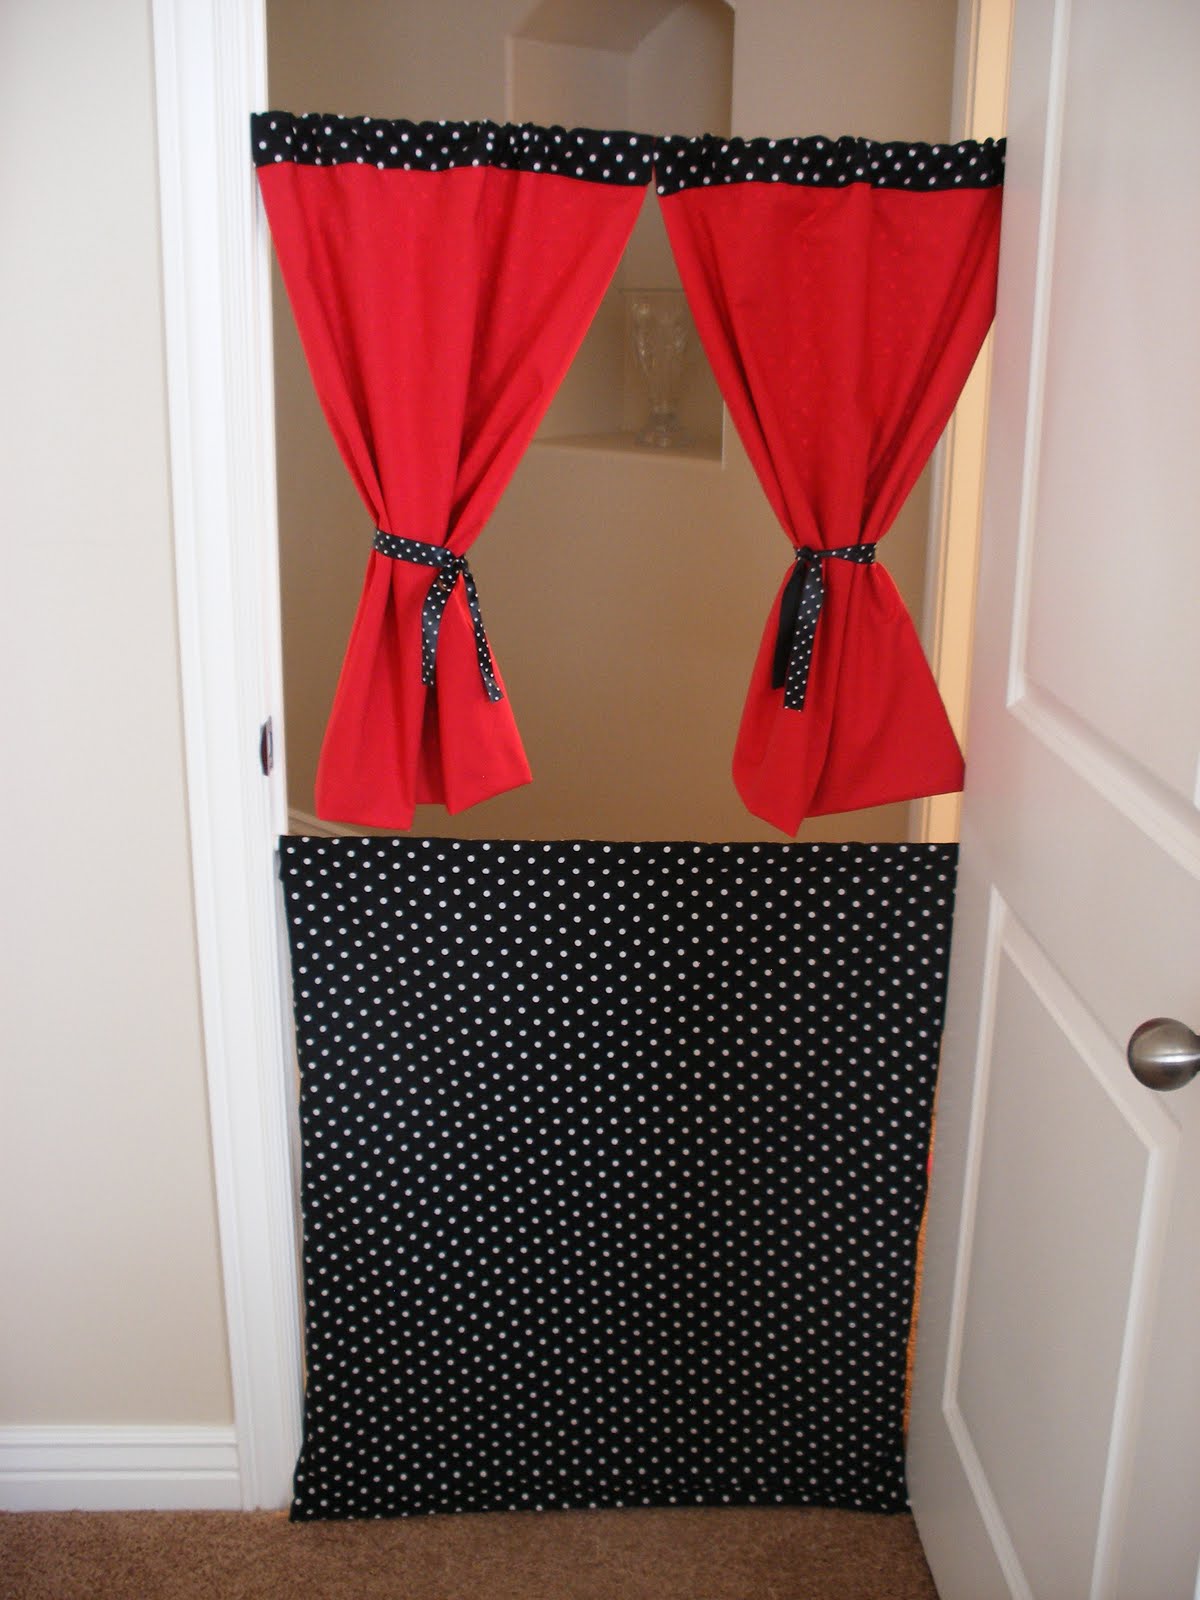
Introducing the doorway puppet theater! I tried to get Matt to help model it, but he kindly declined. haha

I used this tutorial for the curtains. Then I made up the bottom part by myself. It's really just like sewing a giant pillowcase. I just used ribbon for the ties. Make sure you use fray check on the ends!

Also it's not quite done yet. I really want to buy some of this cool fabric to make a sign. I'll probably use some red fabric scraps to make a border around the chalkboard fabric. The sign would just attach the bottom part of the theater with a safety pin for easy removal. How fun though for the kids to be able to write out with chalk what show will be playing in their puppet theater.

For another version of the doorway puppet theater check out my sister in law Jill's. I probably would've done her version, but I was too cheap to buy the book that had the instructions in it. I really should figure out how to sew that bag to keep it in, but that's a project for another day.

Now I just need to make some cool puppets! I wonder how hard Muppet puppets would be. hmmm....

Thursday, April 8, 2010

Humpty Dumpty


One of my favorite crafter's is Lier from Ikatbag. If you have some free time you should read through her archives. She makes the best kid toys, stuffed animals, dolls, dress-up clothes, and playhouses. I want to copy everything she does and stayed tuned in May because I'm going to make a fabric playhouse similar to hers and a few others I've seen (with a few of my own designs of course). Matt is even going to get involved and help me build the pvc pipe frame for it. So excited!

Anyways when I saw this free Humpty Dumpty stuffed animal pattern I instantly thought of Matt's sister Lisa. She decided to decorate her babies room with a nursery rhyme theme. How could I resist making her this adorable Humpty Dumpty? I think it will look adorable sitting on a shelf in baby Audrey's room. I even made him to match her colors baby blue and pink. His limbs are also detachable like Lier's so the kids can put him back to together again.

He was pretty easy to sew together except I got stuck on his legs. Eventually I figured it out, but not without some frustration. My machine was also not liking the button holes. I think it was the cheap thread I was using which kept breaking mid-button hole and it wasn't the needle because I just changed it. So I learned that when I'm doing button holes I should use high quality thread. Oh well I will just ignore those imperfect buttonholes and move on. I think he turned out pretty cute and will look good in the room. What do you think?