Tuesday, October 26, 2010

Belle Costume


Matt's friend Levin asked me to make a Belle costume for his 2 year old daughter Ansley. His wife died in a car accident a year ago so I thought it would be nice to make her a costume. I used this New Look Pattern for the bodice and used this belle dress tutorial for the skirt. My mom helped me me make the pretty sash and rose. My mom is so talented! I think it turned out well. It fits her perfectly. Ansley loved it and cried when she had to take it off. She also kept wanting to carry it around when it wasn't on and saying, " Oh what a pretty yellow dress."

While I went to work on the Belle dress. Levin went all out on a beast mask which you can see in the picture. He made it using resin, plaster, paper mache, and fur from old Teddy Bears. I was pretty impressed. It isn't completely done yet so that's why you can see some newspaper. He told me his brother was going to go as the candlestick. I will have to post a picture of the whole clan when they send it to me from Halloween.

Tomorrow I plan on finally posting my felt food that I finished back in August from my pattern testing. Whoops I've been awful about blogging.

Sunday, July 25, 2010

Sugar Cookies

I'm back and finally posting! My MBA has been sucking all my time lately so I haven't had time to do anything. I finished this ages ago, but am now just getting around to posting it. Now introducing the felt sugar cookie set. Kids roll out the cookie dough, cut out the cookies from the dough, toss them in the oven,decorate them, and walah they are done complete with pink frosting and sprinkles. So cute! I'm sort of thinking about figuring out how to make a pastry bag and a rolling pin to add to the set. I might just have to.


Notice anything different about these pictures? I got a new Cannon Camera this month. Notice how much better the image quality is? Yay for good pictures! Matt and I have been playing around with it all week, but we are still amateurs. It might be my next new hobby. That and learning Adobe Photoshop.

For the cookie instructions I used this tutorial I found online.

To display my lovely cookies I used this tutorial to craft up a cute blue cake stand.

More felt food to come soon. I'm going to show off the awesome pattern I got to test for Sweetie Pie Bakery!

Thursday, June 10, 2010

Felt BBQ and More

While I was in Lake Arrowhead in May. Matt's mom and I had a sewing party. It's fun sewing with other people. I've offered to have sewing parties at my house, but sewing seems to be a lost art so nobody is interested. Our project of choice was making more felt food.

I had purchased this pattern a while ago so we decided to make some cheese burgers from this pattern. It was fun and they both turned out so cute. I definitely recommend this pattern and it was definitely worth the money.

When I got home I finished the set by making the hot dog, steak, and grill. The grill was pretty time consuming, but I did it while I was watching TV so I honestly didn't think it was too bad.


Eventually I want to add a soft drink, french fries, and condiments for the hot dog to the set. I'm planning on covering a small Pringles container for the soft drink. If only I had more time! Maybe I'll post a tutorial for them when I get around to them. This will definitely be after I'm done with my MBA in August.

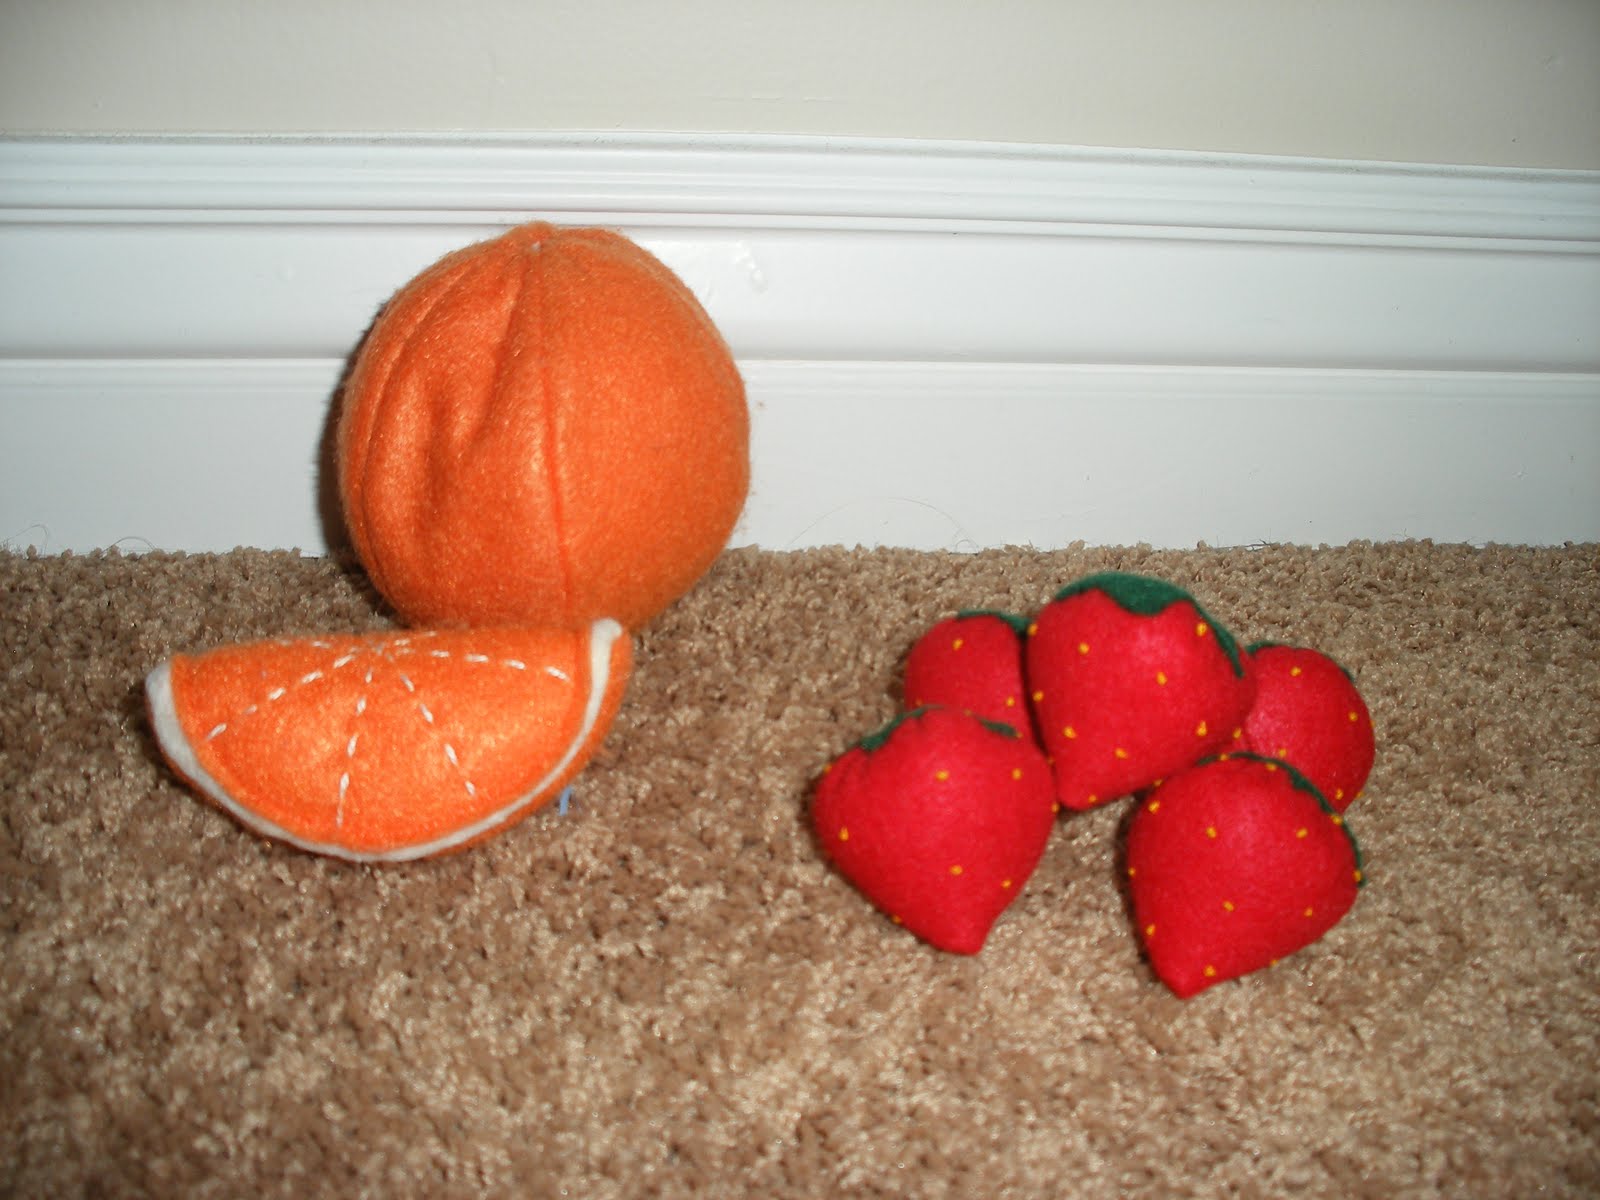
Matt's mom and I also made a felt orange. We used this tutorial for the orange peel and this tutorial for the orange wedges. One tip is to make the orange peel first and then make the orange wedges. We ended up only needing 4 sections to fill our orange instead of 6 which is what the tutorial said. We also gathered the top to make an orange naval because our oranges ended up looking funky at the top. Maybe we did something wrong not sure? Overall adding the gathering at the top fixed it and it turned out so cute. I'm in love!


I also finished three other random felt food items. Felt strawberries, eggs, and a baked potato. I love just making random stuff to add to the collection and when I eat real food I think about how to make a felt version. I'm having a blast. If it doesn't entertain my kids it at least entertained me!

I used this tutorial for the strawberries. However the pattern printed way too small so I had to play with it to get it the right size. I guess I can't complain since it's free, but it was frustrating and I had to make a couple test strawberries to make sure it was big enough. I wasn't about to embroider all those french knots on them if they didn't turn out!

I used this tutorial for the eggs in the egg carton. I believe I used the larger egg size and it worked out perfectly using the edge of my presser foot. Very easy and fast. Also this seems to be the favorite felt food item with kids. Strange I know, but they love taking the eggs out of the carton.

The baked potato was pretty easy. I basically just sewed a white oval and stuffed it. Then I sewed a matching brown oval and cut down the center. Then I sewed some yellow fleece together in a small square for the butter. Pretty simple.

Tuesday, June 1, 2010

Making your shirts actually fit

So over the past week Matt and I have stopped by the Van Hansen outlet. They were having a mega sale and had some really cute T-shirts for $8. Problem was they didn't fit well. For some bizarre reason their shirts tend to be wider and baggier than most shirts even in extra-small. I decided to buy them anyways. I guess I fell in love with the cute ruffles and yoyos on them.

Today when I went to go wear it I looked in the mirror and sort of regretted buying them. They made me look fatter than I actually am. So I went on a search on how to take in a t-shirt. I came across this video. I then took a leap of faith and tried it out.

I was so surprised when after 5 minutes of work it looked great! I wish I knew how easy this was before!

Thank you youtube! Now I don't have to look frumpy and can enjoy my $8 shirts. I might just have to go through my closet and make more of my shirts fit perfectly.

Before


ew I'm even embarassed to post the before. Not flattering!

After


*The pictures don't show off the drastic change as much as in person. Just take my word for it. It was a huge difference. I took in 2 inches on both sides! Yes ironing does make a difference too, but aren't all before pictures supposed to look awful so everyone is shocked with the final result?

Saturday, May 15, 2010

T-shirt Makeover

I don't know about you, but my summer wardrobe is pretty boring. I usually just buy plain T-shirts and dress it up with jewelry. It's fine, but I wanted a change. I love how J-crew dresses up the common t-shirt, but I'm cheap and really don't want to pay those prices. So when I came across this tutorial I had to try it. It did take awhile, but I absolutely love the result. Plus I found the shirts for $3 a piece so the shirt only cost me $6!

Just pop in a chick flick and you too can make a cute shirt. It doesn't even require a sewing machine and if I pulled it off with horrible hand sewing abilities so can you!

* The color is a very pretty lavendar. My camera doesn't ever capture my crafts well. Maybe someday I will have a nice Canon camera. Until then everyone will just have to put up with my crummy camera and photography skills!


Tuesday, April 13, 2010

Puppet Theater


Introducing the doorway puppet theater! I tried to get Matt to help model it, but he kindly declined. haha

I used this tutorial for the curtains. Then I made up the bottom part by myself. It's really just like sewing a giant pillowcase. I just used ribbon for the ties. Make sure you use fray check on the ends!

Also it's not quite done yet. I really want to buy some of this cool fabric to make a sign. I'll probably use some red fabric scraps to make a border around the chalkboard fabric. The sign would just attach the bottom part of the theater with a safety pin for easy removal. How fun though for the kids to be able to write out with chalk what show will be playing in their puppet theater.

For another version of the doorway puppet theater check out my sister in law Jill's. I probably would've done her version, but I was too cheap to buy the book that had the instructions in it. I really should figure out how to sew that bag to keep it in, but that's a project for another day.

Now I just need to make some cool puppets! I wonder how hard Muppet puppets would be. hmmm....

Thursday, April 8, 2010

Humpty Dumpty


One of my favorite crafter's is Lier from Ikatbag. If you have some free time you should read through her archives. She makes the best kid toys, stuffed animals, dolls, dress-up clothes, and playhouses. I want to copy everything she does and stayed tuned in May because I'm going to make a fabric playhouse similar to hers and a few others I've seen (with a few of my own designs of course). Matt is even going to get involved and help me build the pvc pipe frame for it. So excited!

Anyways when I saw this free Humpty Dumpty stuffed animal pattern I instantly thought of Matt's sister Lisa. She decided to decorate her babies room with a nursery rhyme theme. How could I resist making her this adorable Humpty Dumpty? I think it will look adorable sitting on a shelf in baby Audrey's room. I even made him to match her colors baby blue and pink. His limbs are also detachable like Lier's so the kids can put him back to together again.

He was pretty easy to sew together except I got stuck on his legs. Eventually I figured it out, but not without some frustration. My machine was also not liking the button holes. I think it was the cheap thread I was using which kept breaking mid-button hole and it wasn't the needle because I just changed it. So I learned that when I'm doing button holes I should use high quality thread. Oh well I will just ignore those imperfect buttonholes and move on. I think he turned out pretty cute and will look good in the room. What do you think?