Wednesday, November 4, 2009

Quiet Book Pages 17-20

Yah another 4 pages! The first page is a Rocketship that the kids can move along the string to the moon. This is a pretty basic page, but it's good to have some pages for the kids when they are smaller. The robot page took me forever probably because of all the detail that went into it. This page the kids can pull the elastic legs/arms and play a memory game that is inside the robots tummy. I got the ideas and templates from this site. The third page is a pages where the kids can button the flowers on and off. The last page is a dress me page. I made it unisex so it can be either a boy or a girl by changing the hair. I cut out a ton of clothes like a soccer uniform, a suit, skirts, dresses, etc. A ton of quiet books have both of these pages so it wasn't really my idea, but it's cute! I used this site for a template for the body of the dress-up page.


Monday, October 19, 2009

Quiet book pages 13-16

I whipped out another four pages! I'm trying to finish this project so that my house can be clean again this is a seriously messy project. The first page is Noah's Ark. Every good quiet book has a Noah's Ark page it seems so it definitely wasn't a new idea. The ark zipper opens and inside is a bunch of animal finger puppets that I got from Ikea for $6. The second page is a horse. This page is for kids to practice braiding by braiding the horses tail. The tiny pocket holds rubber bands and ribbon for them to secure their braids. The third page is a frog puzzle. I love frogs so I had to figure out how to include a frog somewhere in the book. I could also add more puzzles later if they get sick of this one. The purse page was actually inspired by my neice Kate. Last Christmas break she loved looking in purses and it kept her quiet at church. I'm planning on making felt makeup, a cell phone, keys, credit cards, and money to go into the purse. I'll wait until the rest of the book is done before I tackle that project. I will do it though!


Thursday, September 17, 2009

Quiet book page 9-12


Meet Sammy the blue monster. I just realized that he ended up looking a lot like a Sesame Street character haha (A blue Elmo?). In these two pages the kids get to feed Sammy healthy foods and set the table. Sammy's tummy has a zipper so the kids can retrieve the food after it's digested to feed him over and over again. I got this idea from my mom's beautiful quiet book. It has sentimental value since I loved this page when I was little. I finished this page quickly because it fits into my sunbeam lesson this week, "I eat food and wear clothes." How am I supposed to fill up an hour with that topic? By letting the kids feed Sammy of course (well it will at least entertain them for 10 min)!


These lovely pages are the reason I wanted to start the quiet book. I saw this adorable oven and cupcake page and thought it was so cute. Thus it spurred my desire to do a quiet book. In these pages the kids get to count the cupcakes, put them in the oven to bake, and then put them into the cupcake liners. Cute I think yes!

Sunday, September 13, 2009

Quiet Book Pages 5-8

I was able to knock out a few more pages. This quiet book is really improving my sewing. I was able to machine sew on the letters spelling Mail and the potatohead body perfectly! I think I will never hand sew anything again now that I can trace better with my machine.


These two pages are for the kids to play mail. I got the idea here. I'm going to add a notebook and a pen in the pockets so that the kids can write messages to each other and stick it in the mailbox. I could also make felt pieces of mail and felt stamps if I so chose later. We'll see....


The first page is for the kids to practice tying their shoes. I want this book to be a learning book as much as a fun book. The Mr/Mrs potato head was a blast to make. I cut out different hats, beards, glasses, shoes, noses, hair, eyes, etc. I used this website for the patterns. Above is featured the pirate potatohead, but their is a lot of potatoheads you can make with this. I think the kids will have a ton of fun with this one.

Friday, September 11, 2009

Quiet Book Pages 1-4

I started a quiet book for my kids. I'm really glad that I'm doing it now because it takes forever and I would never find the time with kids! I'm also glad that I cut it all out first (all 28 pages ya I know I went a little crazy with all the cute page ideas!) so it makes me finish it all otherwise I would probably give up after 4 pages. Really though I've been having fun with it. It's a great thing to do when I'm taking a break from studying and it's relaxing. These pages aren't how they will appear in the book, but I'm just posting them as I finish them.


The clock page is for the kids to learn how to tell time. They can also just have fun moving the handles around. The barn is fun because the kids open the flaps and have some finger puppets to play with. I copied this page from a blog located here.


The piggy bank is for kids to learn about money. I am going to pick up some play money to put in the piggy when I get the chance. Matt says he wants to teach the kids how to save. hehe. The fishing page is my favorite. Mostly because it's a page I came up with myself and it's cute! The kids will have a blast fishing!

Thursday, September 10, 2009

Spooky Banner, Eek Sign, and Ghost Coasters


Labor day gave me an extra day to craft so I got some time to start working on my Halloween decorations! My mom gave me awesome Halloween magazines (Better Homes and Gardens) so I have a ton of ideas for decorations so I'm starting early. I love Halloween! It will be hard to focus on my MBA knowing all the cute things I want to make. I made the banner to be similar to this banner I came across on the internet. I love her banners and those cute witch hats. I might have to try those.... Anyways I loved it so I copied it and if I do say so myself I think I did a good job ripping it off. And I love having a fireplace to put it on! It took forever to cut out, but once it was all cut out it came together quickly. I had to design the banner myself so now I have the templates to use for other banners (maybe I will copy her Thankful banner too). The Eek sign was more to use my left over scrapbook paper (main project to be seen later) than anything. I just bought a $1 frame at Walmart and cut out some letters and glued them in. Pretty simple, but it will look cute somewhere. Finally I saw cheap shelf liner for a $1 at Big Lots so I decided to make ghost coasters from it. The idea came from the magazine. Well stayed tuned for more Halloween decorations I have a lot more coming.

Wednesday, September 2, 2009

Bowling Bunnies!


I decided to whip up some of these cute bowling bunnies for my future kids. I also made some for the Nieces and Nephews to play with when they are at my mother in laws house. So I made a ton of bunnies 16 to be exact and they are finally done after 4 months! Here is the tutorial I found on Etsy. I did change a couple things from the tutorial to make it better. When I filled the bunnies with rice I put the rice in bags to give it more structure and I added a piece of cardboard at the bottom. I'm not sure how she got hers to stand up, but it wasn't working for me so my method made them way more stable. Wouldn't these be cute in an Easter basket?

Friday, August 21, 2009

Chalkboard Plate and Decorative Letters


So this project was pretty simple. I just took a plate I found for $2 and transformed it into a chalkboard using Chalkboard Spray paint. My one complaint is that it dried a little chunky in places since the plate made it easier to gather paint in places. Maybe that is why I've seen these done on square plates? I still think it turned out cute though. Matt put it to good use and writes me love messages. Isn't he cute?


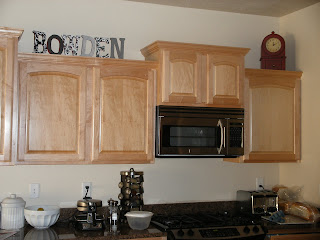
Matt's mom was in town so she helped me to transform these letters. I already had the letters and the paint. We ran to the store to find some cute scrapbook paper and mod pod to adhere it. I originally wanted to these letters to be red, but there is no cute red scrapbook paper and the black paper was adorable. Good thing my kitchen is red, white, and black! Anyways it was a pretty simple project and I love how the red shows on the sides. It matches well with the cute red clock I found!

Sunday, August 16, 2009

Fall Dress

Awhile ago my mom and I bought the materials to sew this dress and we finally finished it! We used the New Look pattern 6750. It turned out great. Our only complaint about the pattern is that we had to fit the top closer at the top because I am smaller above my waist and wider in the hip area. I really like this dress and it will make a great fall dress. Now maybe I'll be brave enough to sew a couple skirts.

Monday, August 3, 2009

Sunflower Wreath


Yes, I made this! I bought a grapevine wreath, foliage, and sunflowers to assemble the wreath. It took me forever to get all the leaves to lay right. I even suffered a few hot glue burns. Ouch! I think it's cute so it was worth it. Plus buying one would have cost $40! I am thinking of adding more flowers or maybe different colored sunflowers, but I also like it plain. We'll see.....

Decorative Corkboards


So I was in Ikea the other day and I saw that they had cork boards for $2-$5 depending on the size. I decided that I was going to take these ugly cork boards and make them cute. I've been wanting to make a necklace holder for a long time now. I don't know if you're like me, but I forget to wear jewelry if I don't see it. This makes it easy to see, keeps my necklaces and bracelets untangled, and can fit easily in my closet. These would make cute bulletin boards for a kitchen or would make great teacher presents.

To make my corkboard. I just cut the fabric to the size of the corkboard and then used spray adhesive to glue it on. Don't worry if you are a little off because the ribbon around the edges help to cover up any mistakes on the sides. After you glue the middle you just cut and glue on the ribbon. I used wood glue to glue on the ribbon and hot glue for the bow. It literally took 10 minutes! Add some bigger sized push pins and you are good to go. Who needs to pay for those expensive necklace holders when you can make one for $5?


Here are some other cute ideas to transform a plain cork board into a cute piece of art for a child's room. I will definitely be doing this when I have kids. What can you do with an ugly cork board?


Friday, July 31, 2009

Twirly Skirt and Headband


I made this cute Twirly skirt and then used this tutorial to make the headband. And remember these fabric flowers? Came in handy didn't they? The size ended up being bigger than I thought. So you might want to sew this for at least a 4 year old. I'm making a variety of sizes so I don't care. The fabric is also a darker pink, but as I have learned my camera is not that great.

June


Better late then never right.....

Wednesday, July 22, 2009

Saturday, June 20, 2009

Martha Stewart Tissue Paper Flowers

I am aware that these decorations look extremely cheesy, but they have there place for certain occasions. Matt teased that our kitchen looked like we had decorated it for a school dance. Haha! I was just dying to try it out. I thought it might also be cute if I attached them to sticks and stuck them in the lawn when we have parties outside. A lot of people hang them from the ceiling for weddings and showers which I wanted to try, but I don't have any string. At least now I know how to make them when I want to entertain. They would also be cute on top of presents. Maybe now my gifts will stop looking so pathetic!

Wednesday, June 17, 2009

4th of July Wreath

I had a fun time making this wreath. I just went to Walmart and the Dollar store to pick up everything to make this cute wreath and made this wreath in about 1 hour while we were watching TV. I have some more decorations coming so I'll post those soon.

Wednesday, May 27, 2009

Baby Gifts

I had some friends and family that are having baby boys so I decided to make homemade gifts for them. I just bought some baby satin, fleece, and some onesies. I gained an appreciation for my machine when it sewed through all those layers of fleece with no problem. Here's a picture of the end result.

Thursday, April 9, 2009

Cute Apron

So a couple years ago there was a company that came out in Utah called Flirty Aprons. I thought their aprons were cute, but they are way too expensive. While I was at Walmart, I saw a pattern for a dollar that had a similar look to flirty aprons , but without the ruffles at the bottom (Flirty Skirty Apron - Pattern by the Apron Lady). I then chose some cute fabric to make the apron it only cost about $5.00 which is way better than $30.00. I followed the pattern exactly and then added my own fabric bows at the top (I didn't attach them directly, but used mini- safety pins so the bows don't get ruined in the washing machine). I could eventually add ruffles at the bottom, but I'm feeling lazy. By the way the picture doesn't do it justice and it's way cuter in person for some reason the print didn't like my camera and this was the best shot I could get. Maybe I should give these out as wedding presents. What do you think, would you like one?

Monday, April 6, 2009

May

Thanks to general conference I was able to finish May early. I was able to cut out the fabric and embroider this while I was listening. Which is great because I definitely won't have time because we are moving soon. 2 weeks and counting!


While I was designing May, I tried out some different fabric flowers to find the right one. I thought this flower was adorable, but would look cheesy on my hanging. I am going to use this flower for little girl baby bows. Now I just need to add a button or jewel and attach it to a headband (when I have a little girl of course). Here is the tutorial link it's at the very bottom of the site(http://kindawonderful.typepad.com/pink_paper_peppermints/i_heart_fabric/) it only takes five minutes. Aren't they adorable?

Tuesday, March 31, 2009

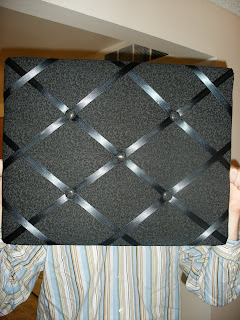
French Memo Board

I've saw these memo boards a few years ago and always thought they were so cute. I found a tutorial online and decided what the hey it will be something cute for our kitchen. Lucky for me it turned out to be an easy project. The hardest part was gathering the materials, but after that it was just stapling and sewing on a few buttons. Now I just need to add pictures of Matt and me to make a lovely piece of art for our kitchen.

Friday, March 27, 2009

Introducing.... April

I'm on a roll with this craft thing. I think I'm going to make these monthly wall hangings into a calendar to go in the kitchen. I have so many craft projects that I've been wanting to do and now I have the time to do them. So stayed tuned I'll be posting them soon.

Tuesday, March 10, 2009

Crafts

Mattie was so kind as to let me get a sewing machine in February! I've been keeping myself sane (all the gmat studying) by doing some crafts at night. I haven't gotten to finish much, but I was able to finish my first project. When I visited my mother in law we started a project for a wall hanging for the month of February. We weren't able to finish the project so she mailed me it later. Below is a picture of her cute project. I stole her idea and decided if I did one for every month it would give me something to do. So here is a picture of my March.


Tuesday, February 17, 2009

Wall Art

Matt and I decided when we were in Costa Rica that we wanted to decorate our house with souvenirs from our vacations together so that we could be reminded of the fun times we had. In Costa Rica we bought some nice salad bowls and some wooden place mats.

This task proved a bit more difficult to do with Disney World because most of the souvenirs were either tacky or pricey. We found a cute black Mickey Mouse frame and a couple dish rags for a decent price. I love puzzles, so I decided that we would make a puzzle out of a collage of our trip. We ordered it from Walmart and it came about week later.

Today we put the puzzle together. The puzzle was only 125 pieces, but it took us 2 hours to put together. It was way harder than I thought it would be! I think it turned out great and it will be a great addition to our house. What do you think?